
Required Tools / Material
- PH0 Screw Driver (it must be PH0, anything else won’t do)
- Tweezers (Optional, but nice to have)
- Thermal Pads (1mm thick, preferably uncut)
- Thermal Pads (2mm thick, preferably uncut)
- Scissors (to cut the thermal pads)
Disclaimer
If you break your camera, it’s not my fault. I also don’t guarantee it will stop overheating in your environment as it depends greatly on the ambient temperature. Adding a fan will almost certainly help.
Disassembly
Remove these screws.
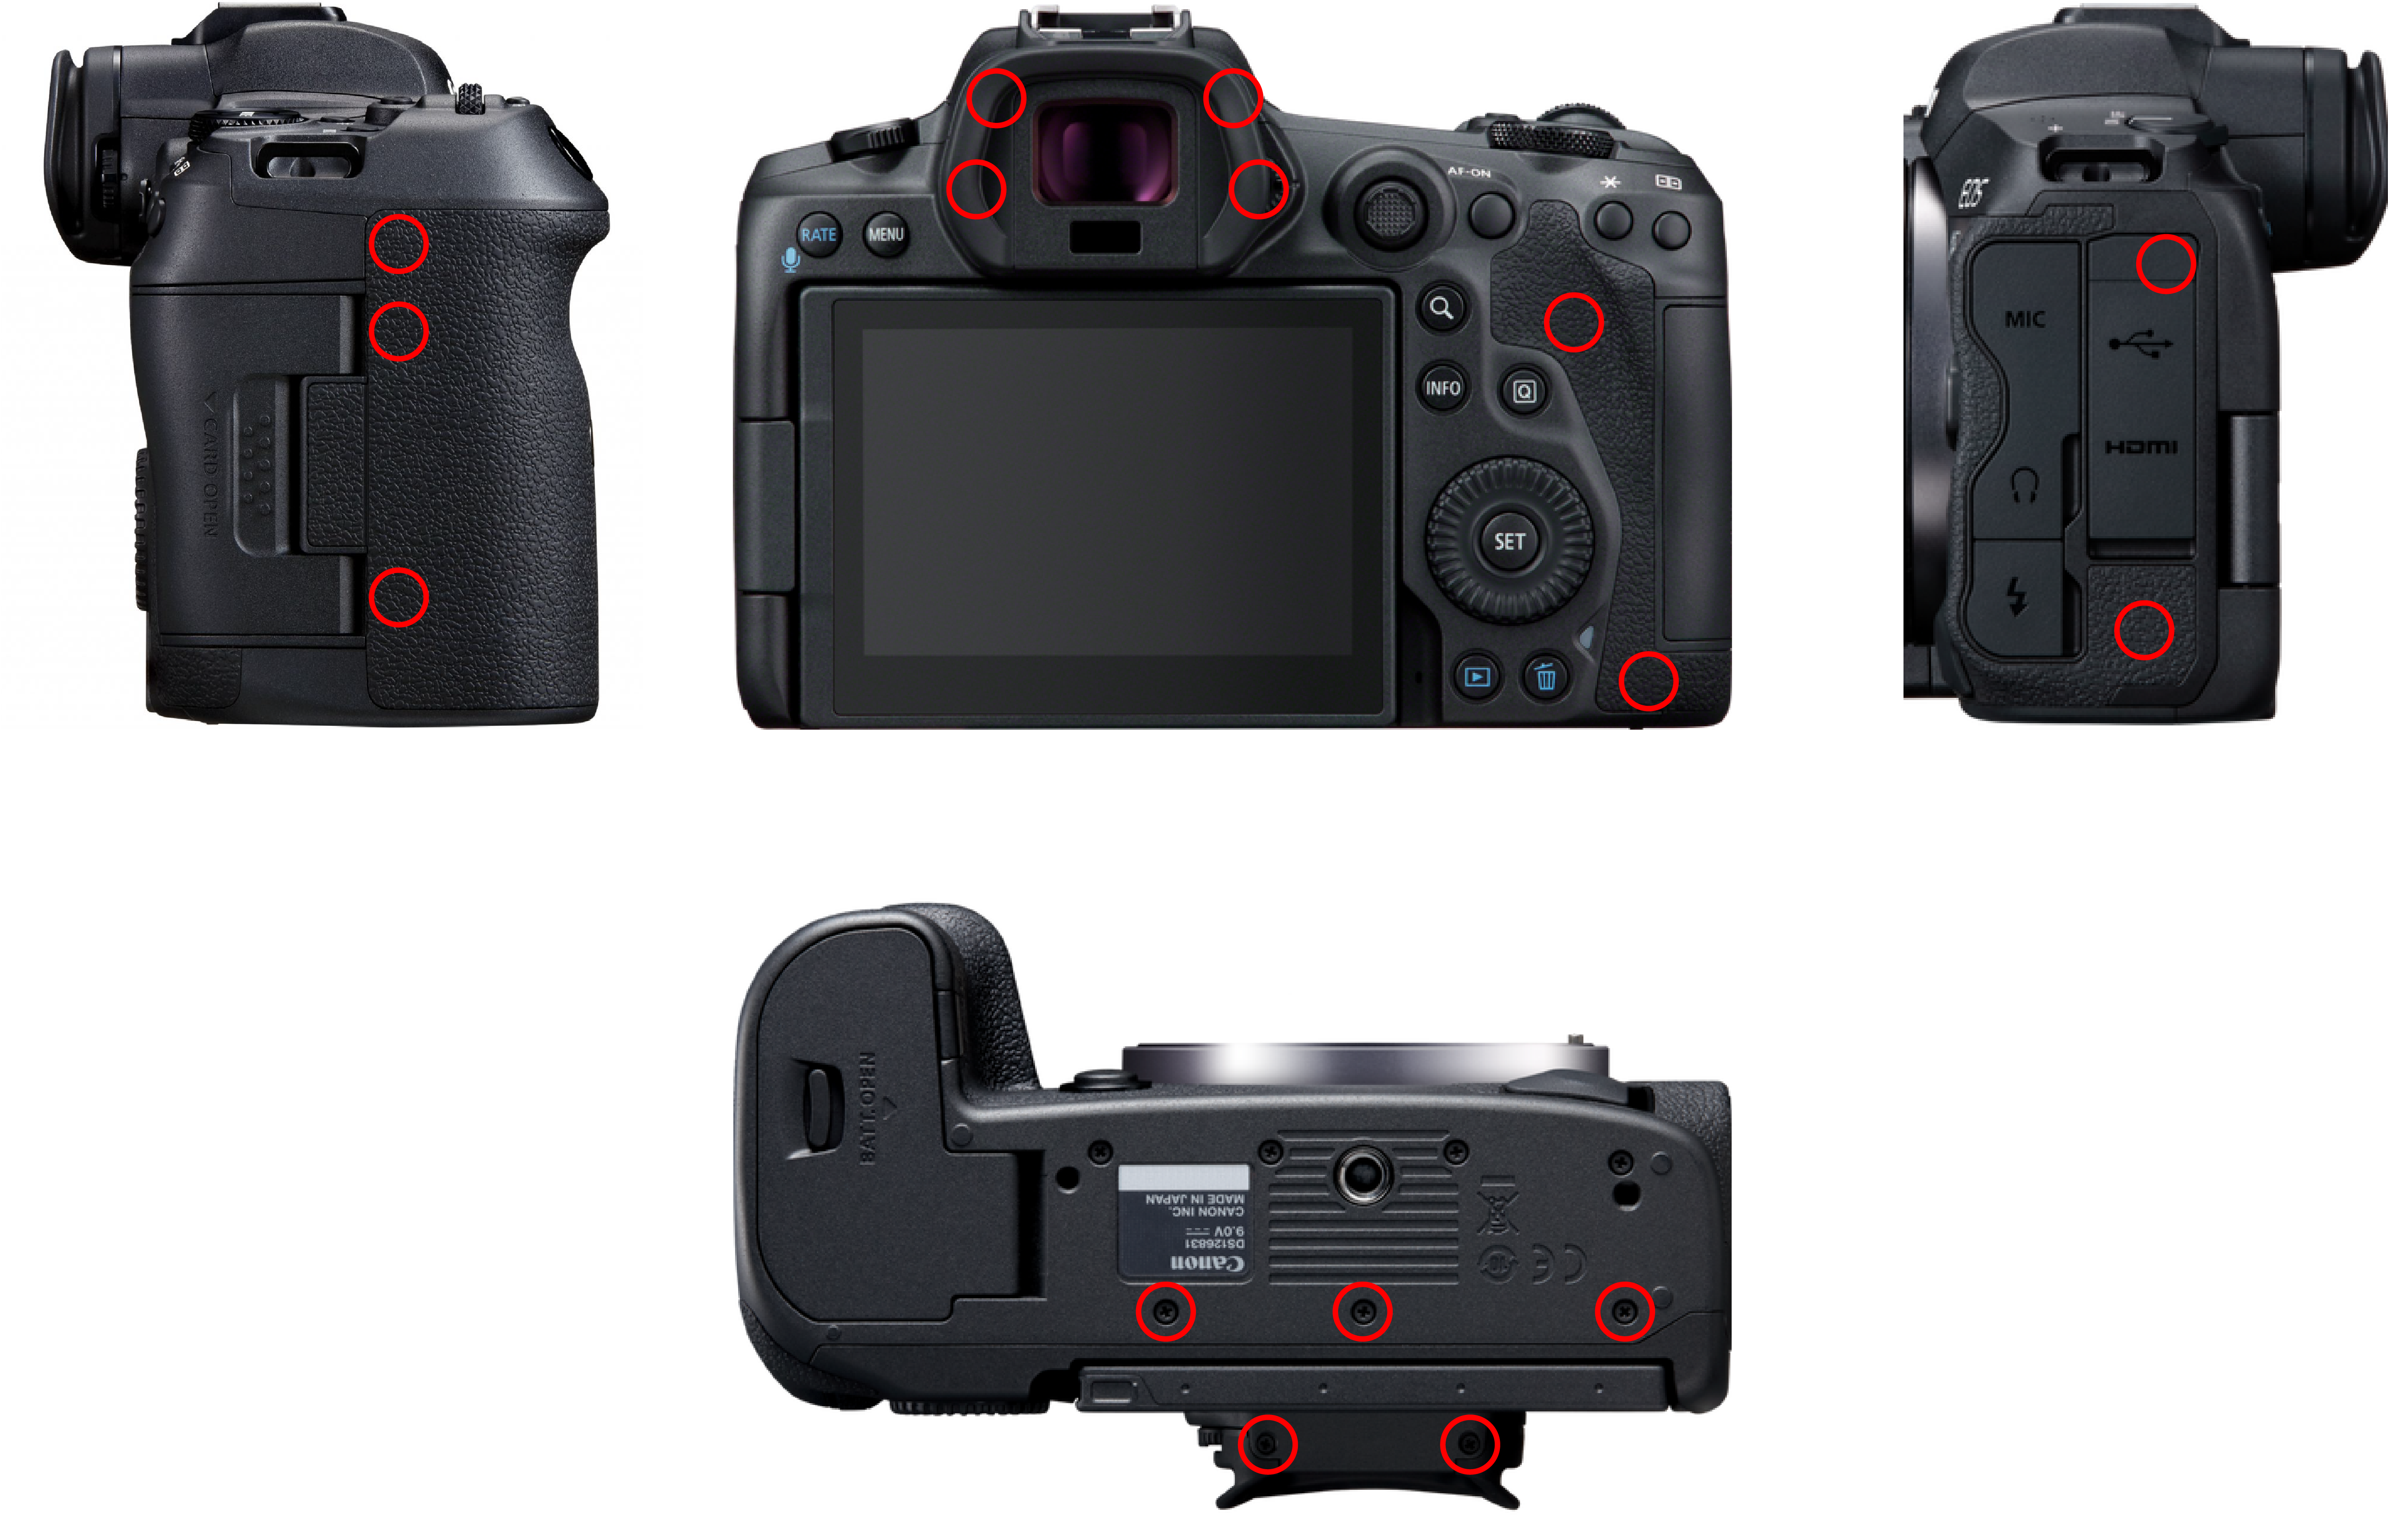
I recommend removing the screws in the order of bottom -> left -> right -> front. If the screws are not visible, they are either under the faux-leather cover (which you can pry up with your finger nails, you don’t need to fully remove the faux-leather to get to the screws), or under the eye-piece cover, which is held in with two screws.
I also recommend printing out the image above, and place the screws in the red circles as you go.
After you removed these screws, SLOWLY lift up the front panel by the card slot and the screen hinge. It may take a little force to dislodge, but it shouldn’t be very hard. There’s one flex cable to disconnect, make sure it’s fully disconnected before it fully comes apart.
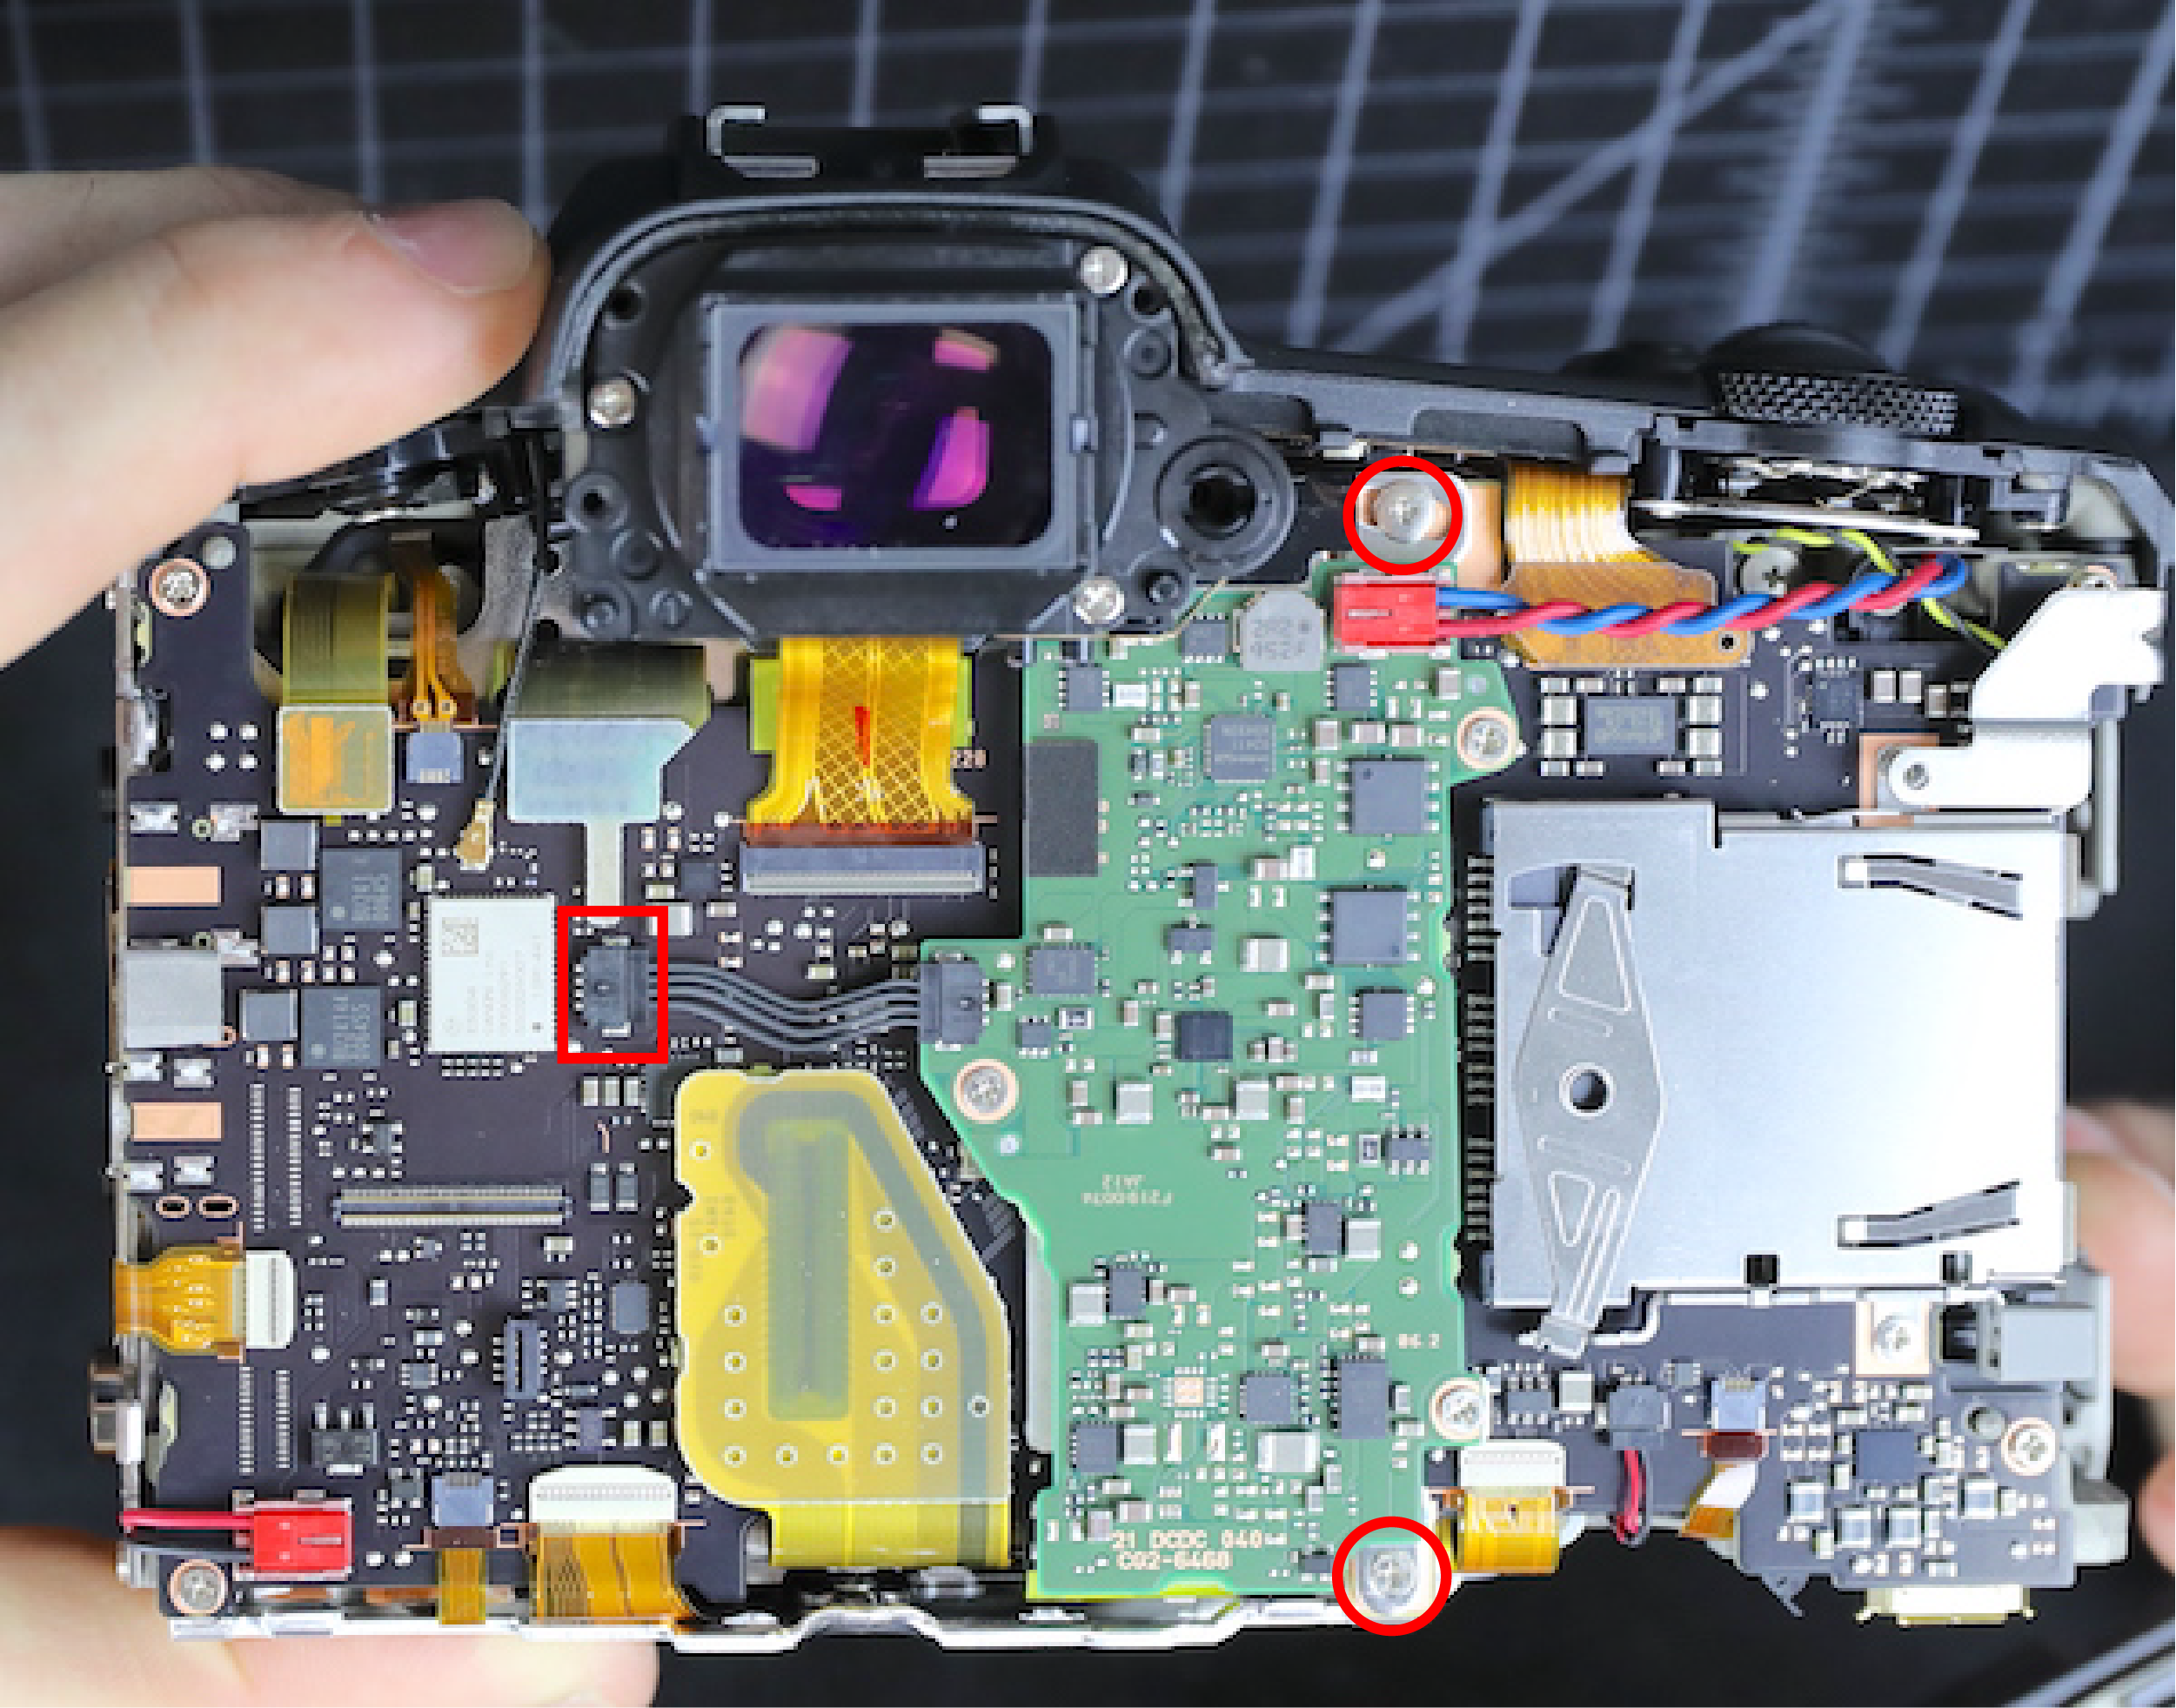
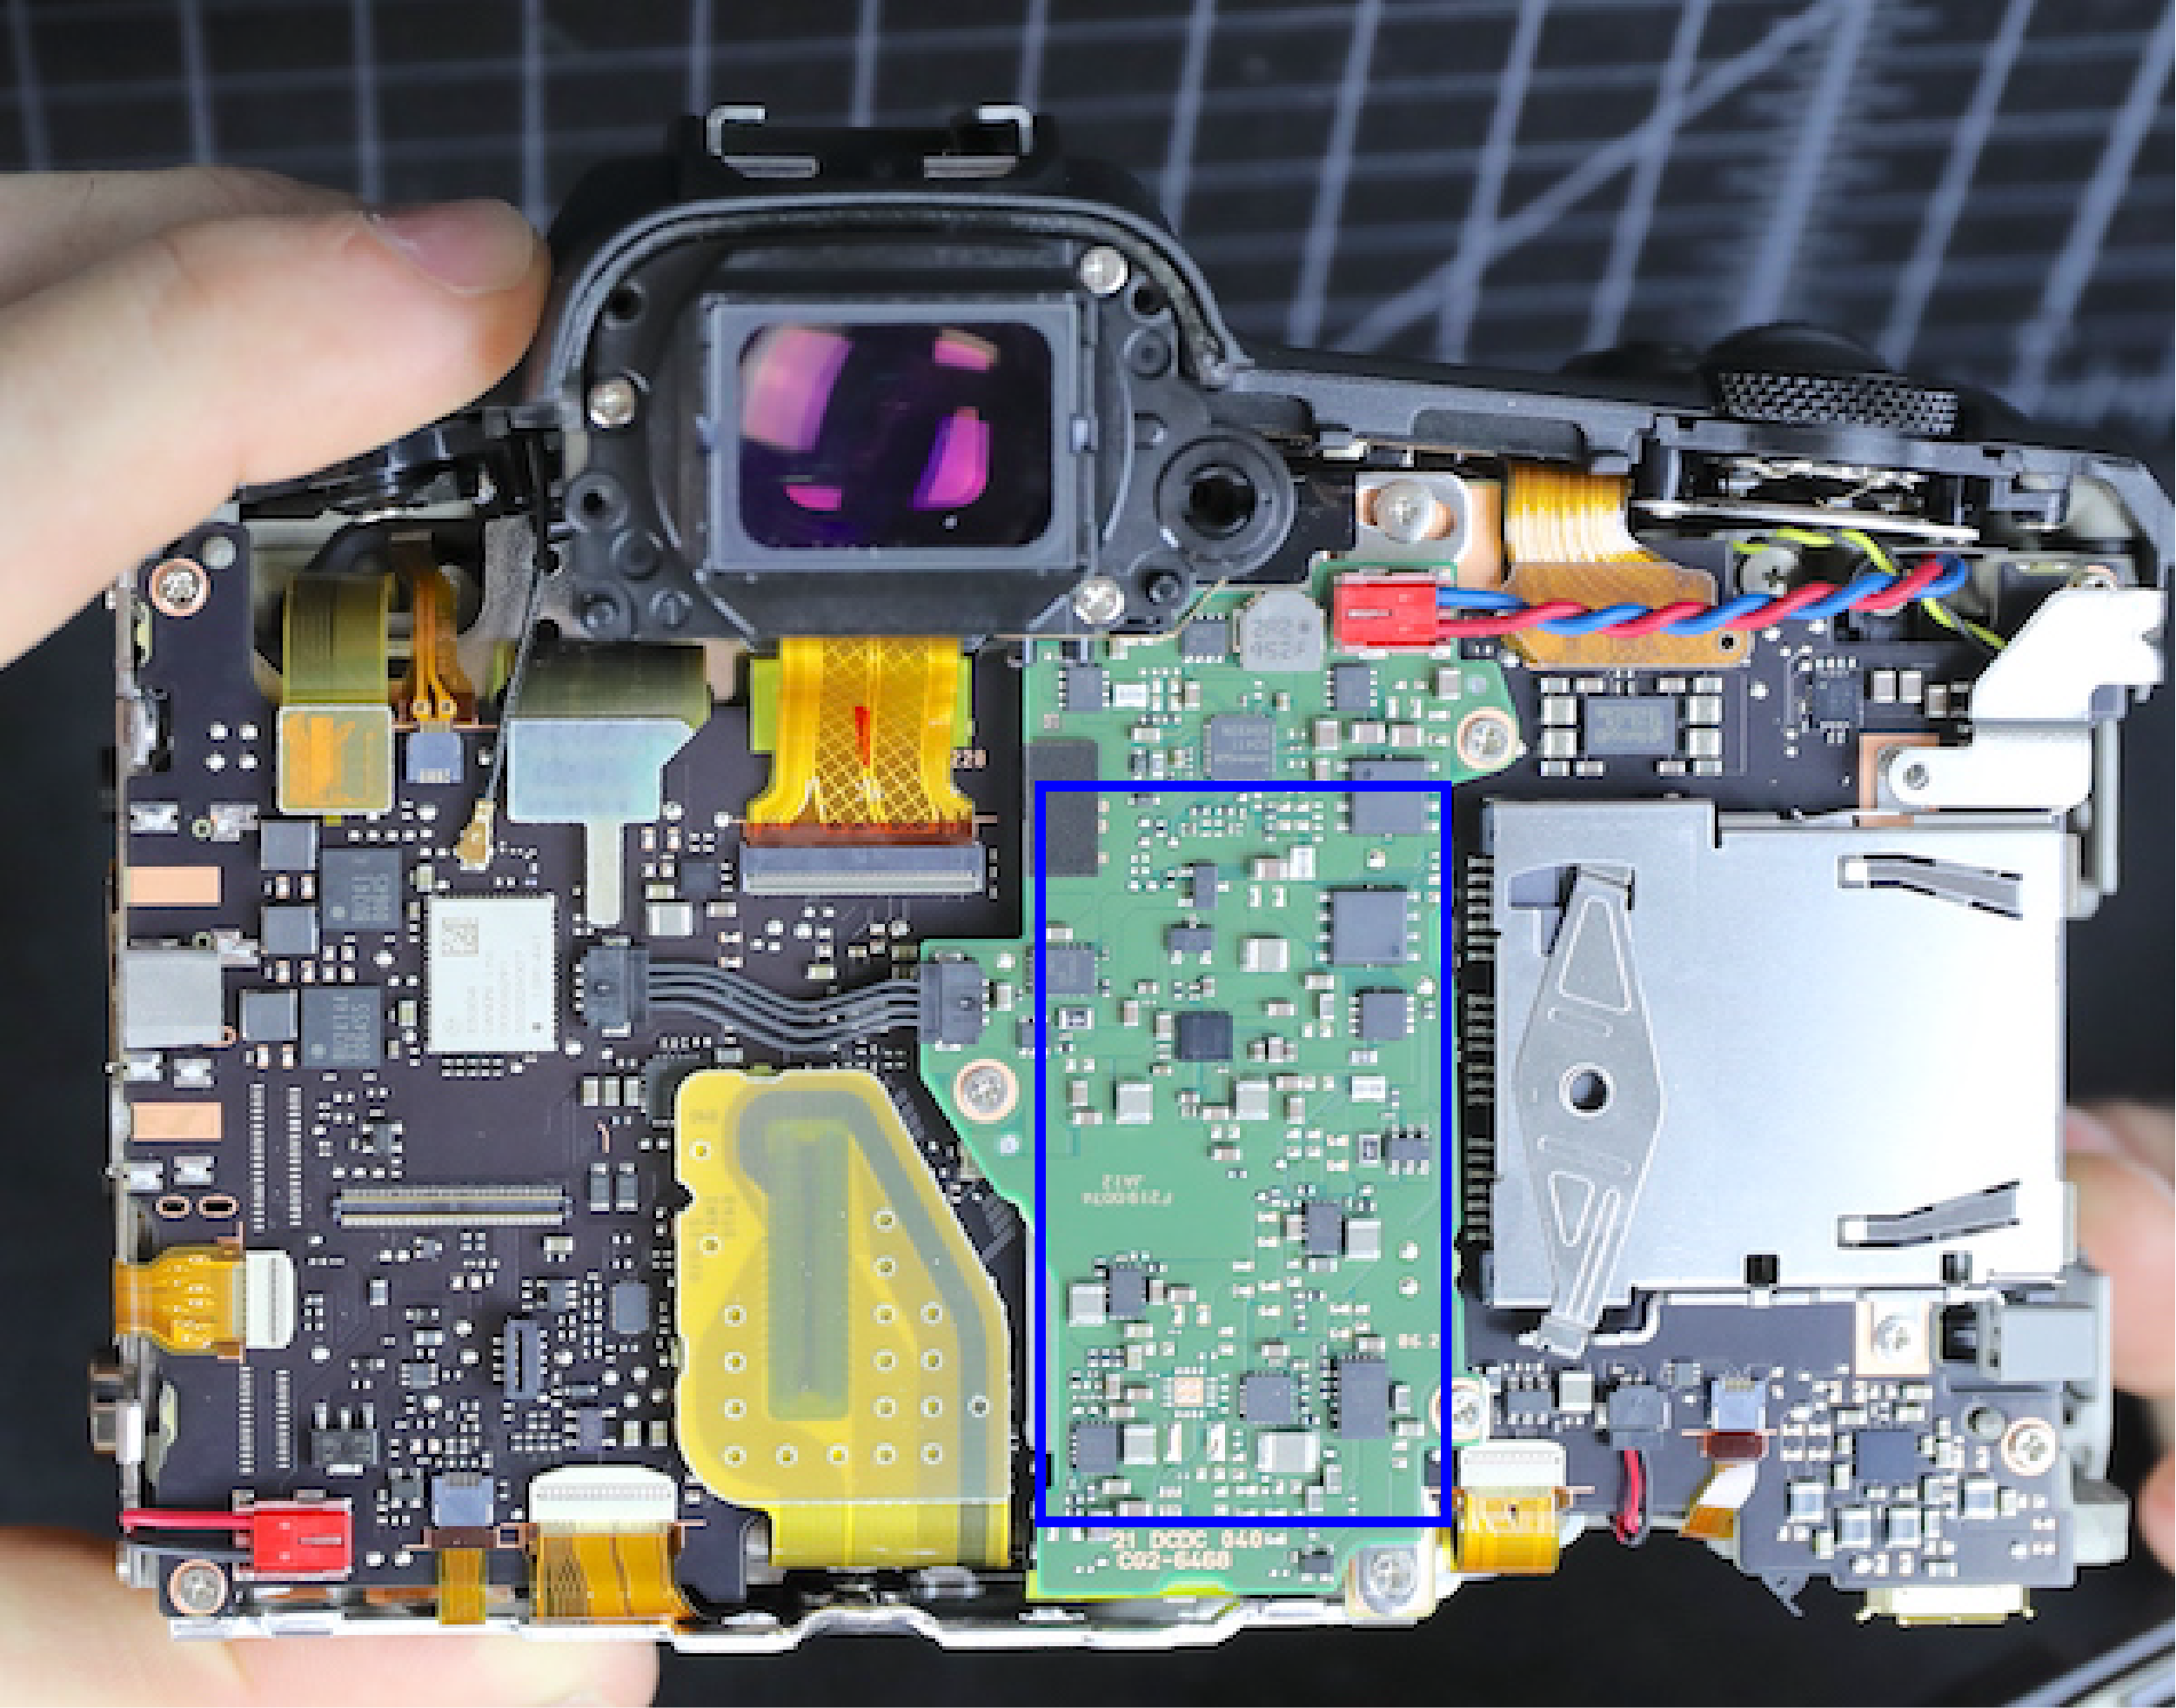
Remove the cable shown in the red box, and remove the screws in the red circles. You should now be able to flip the green board upwards.
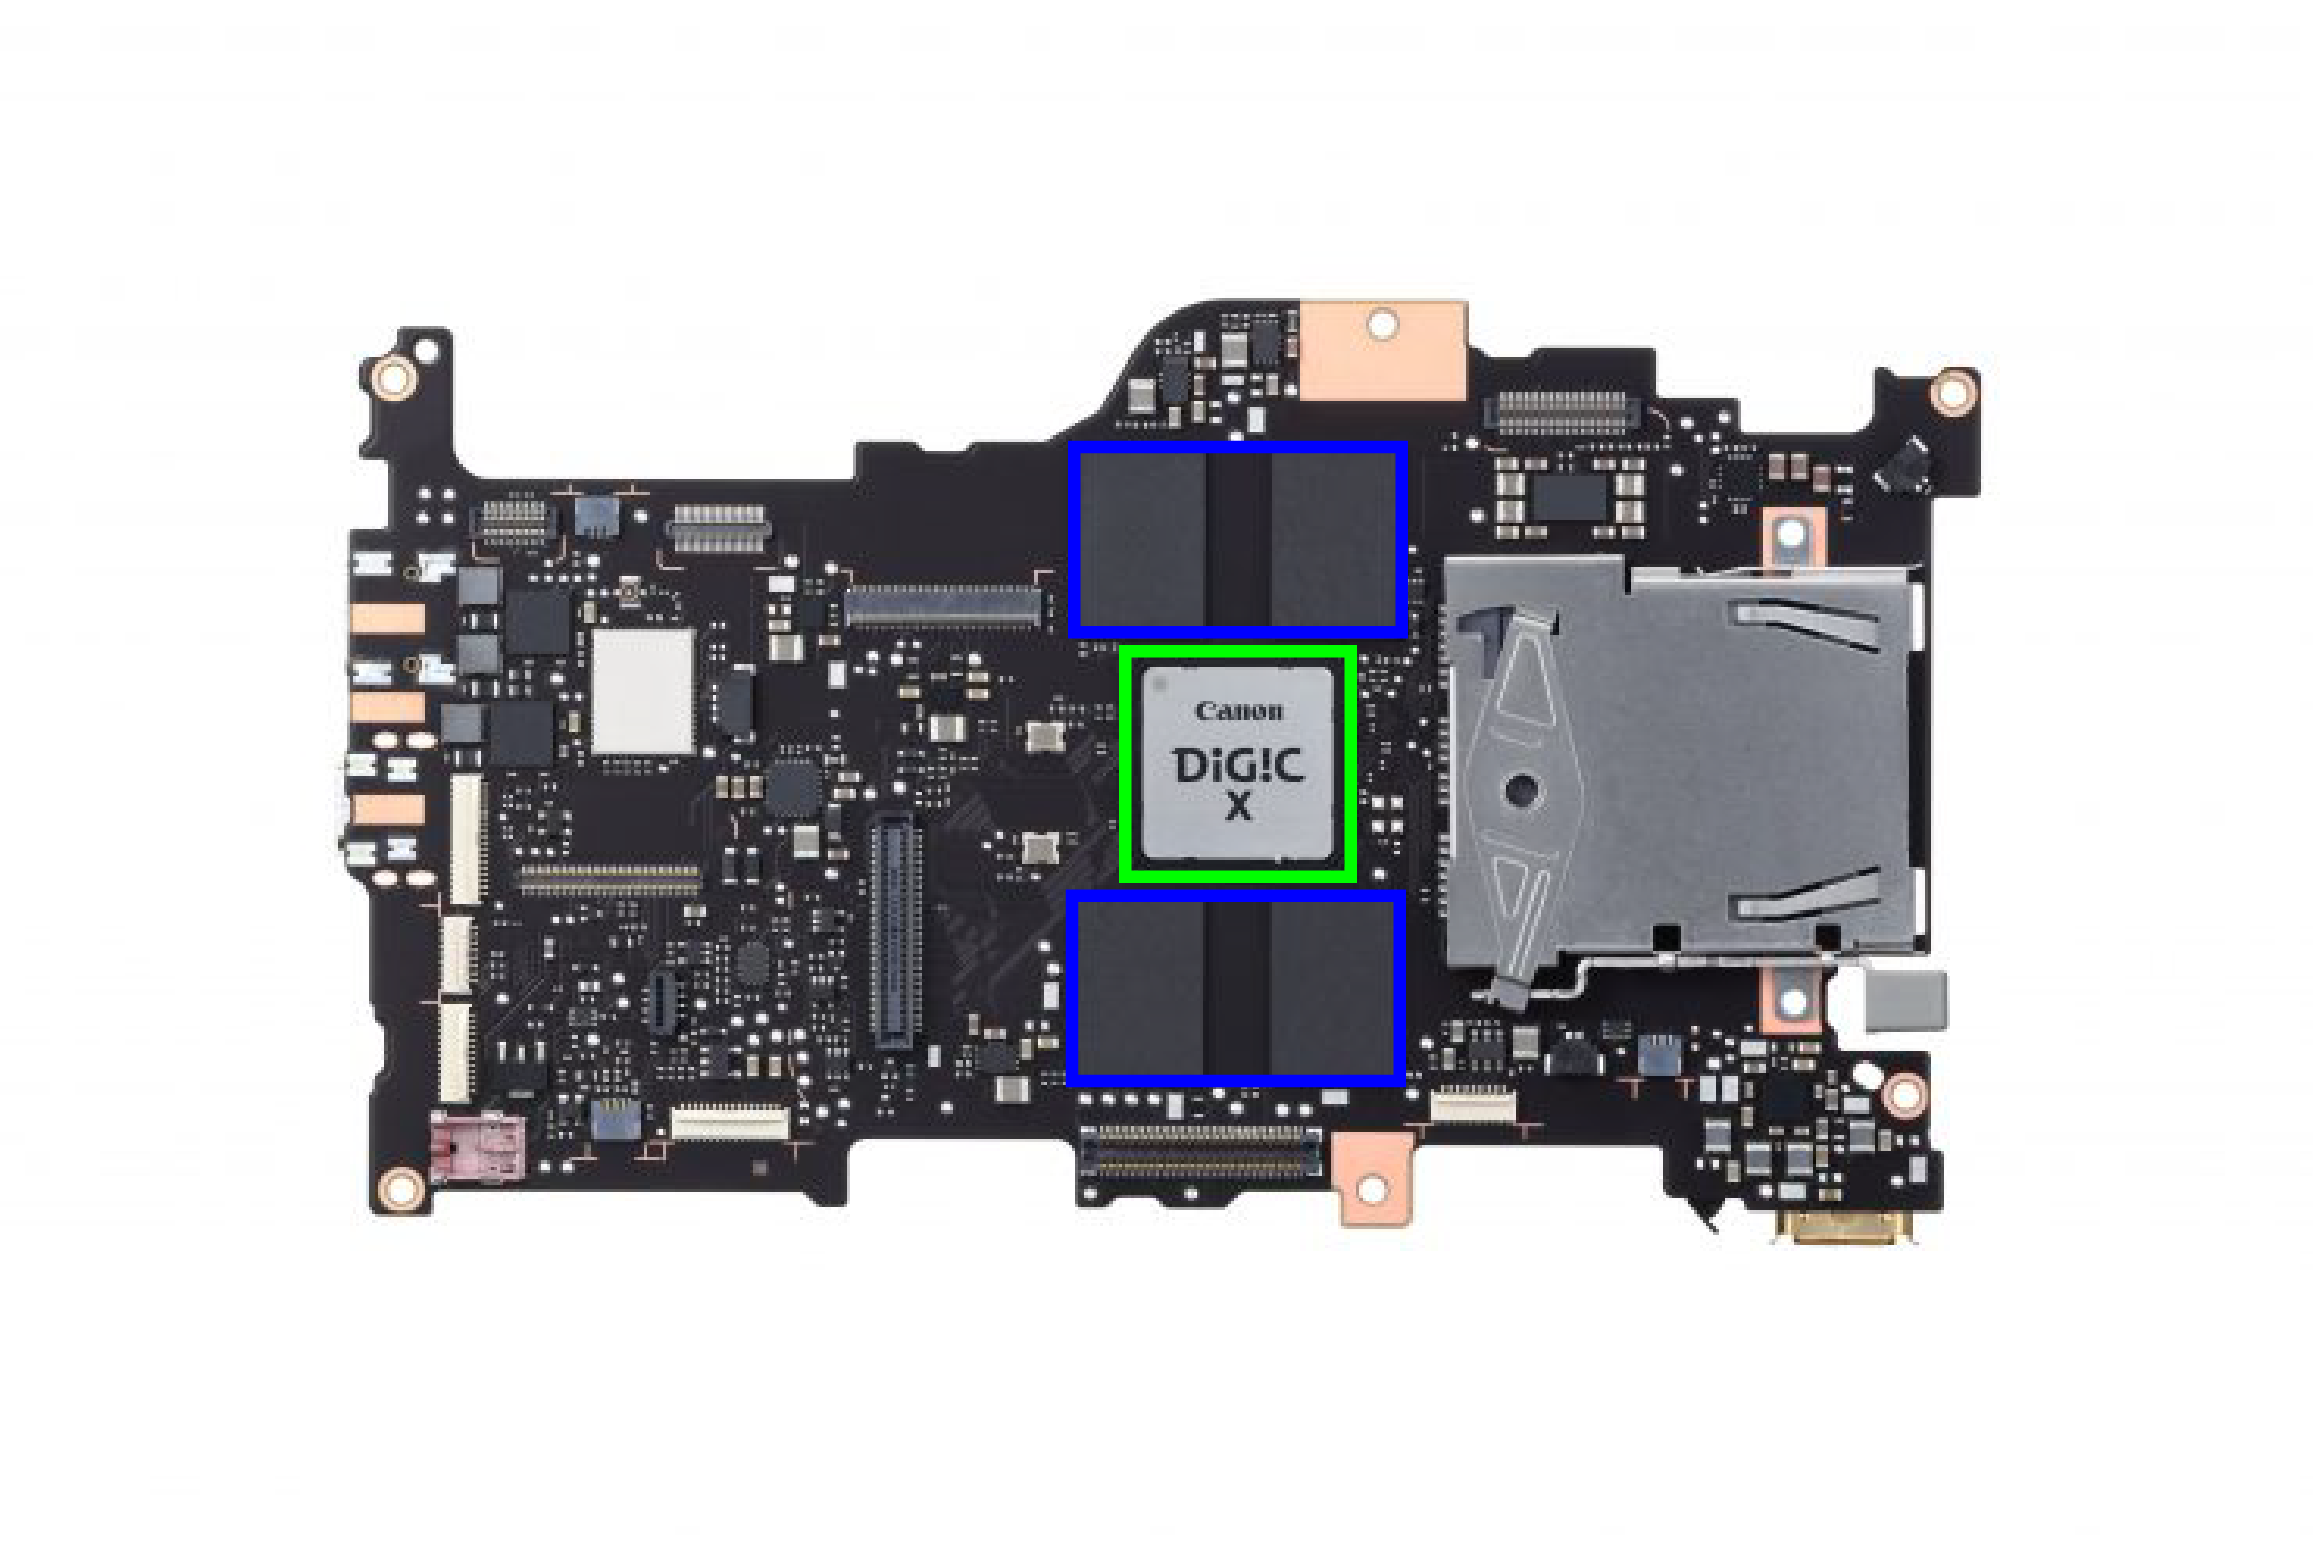
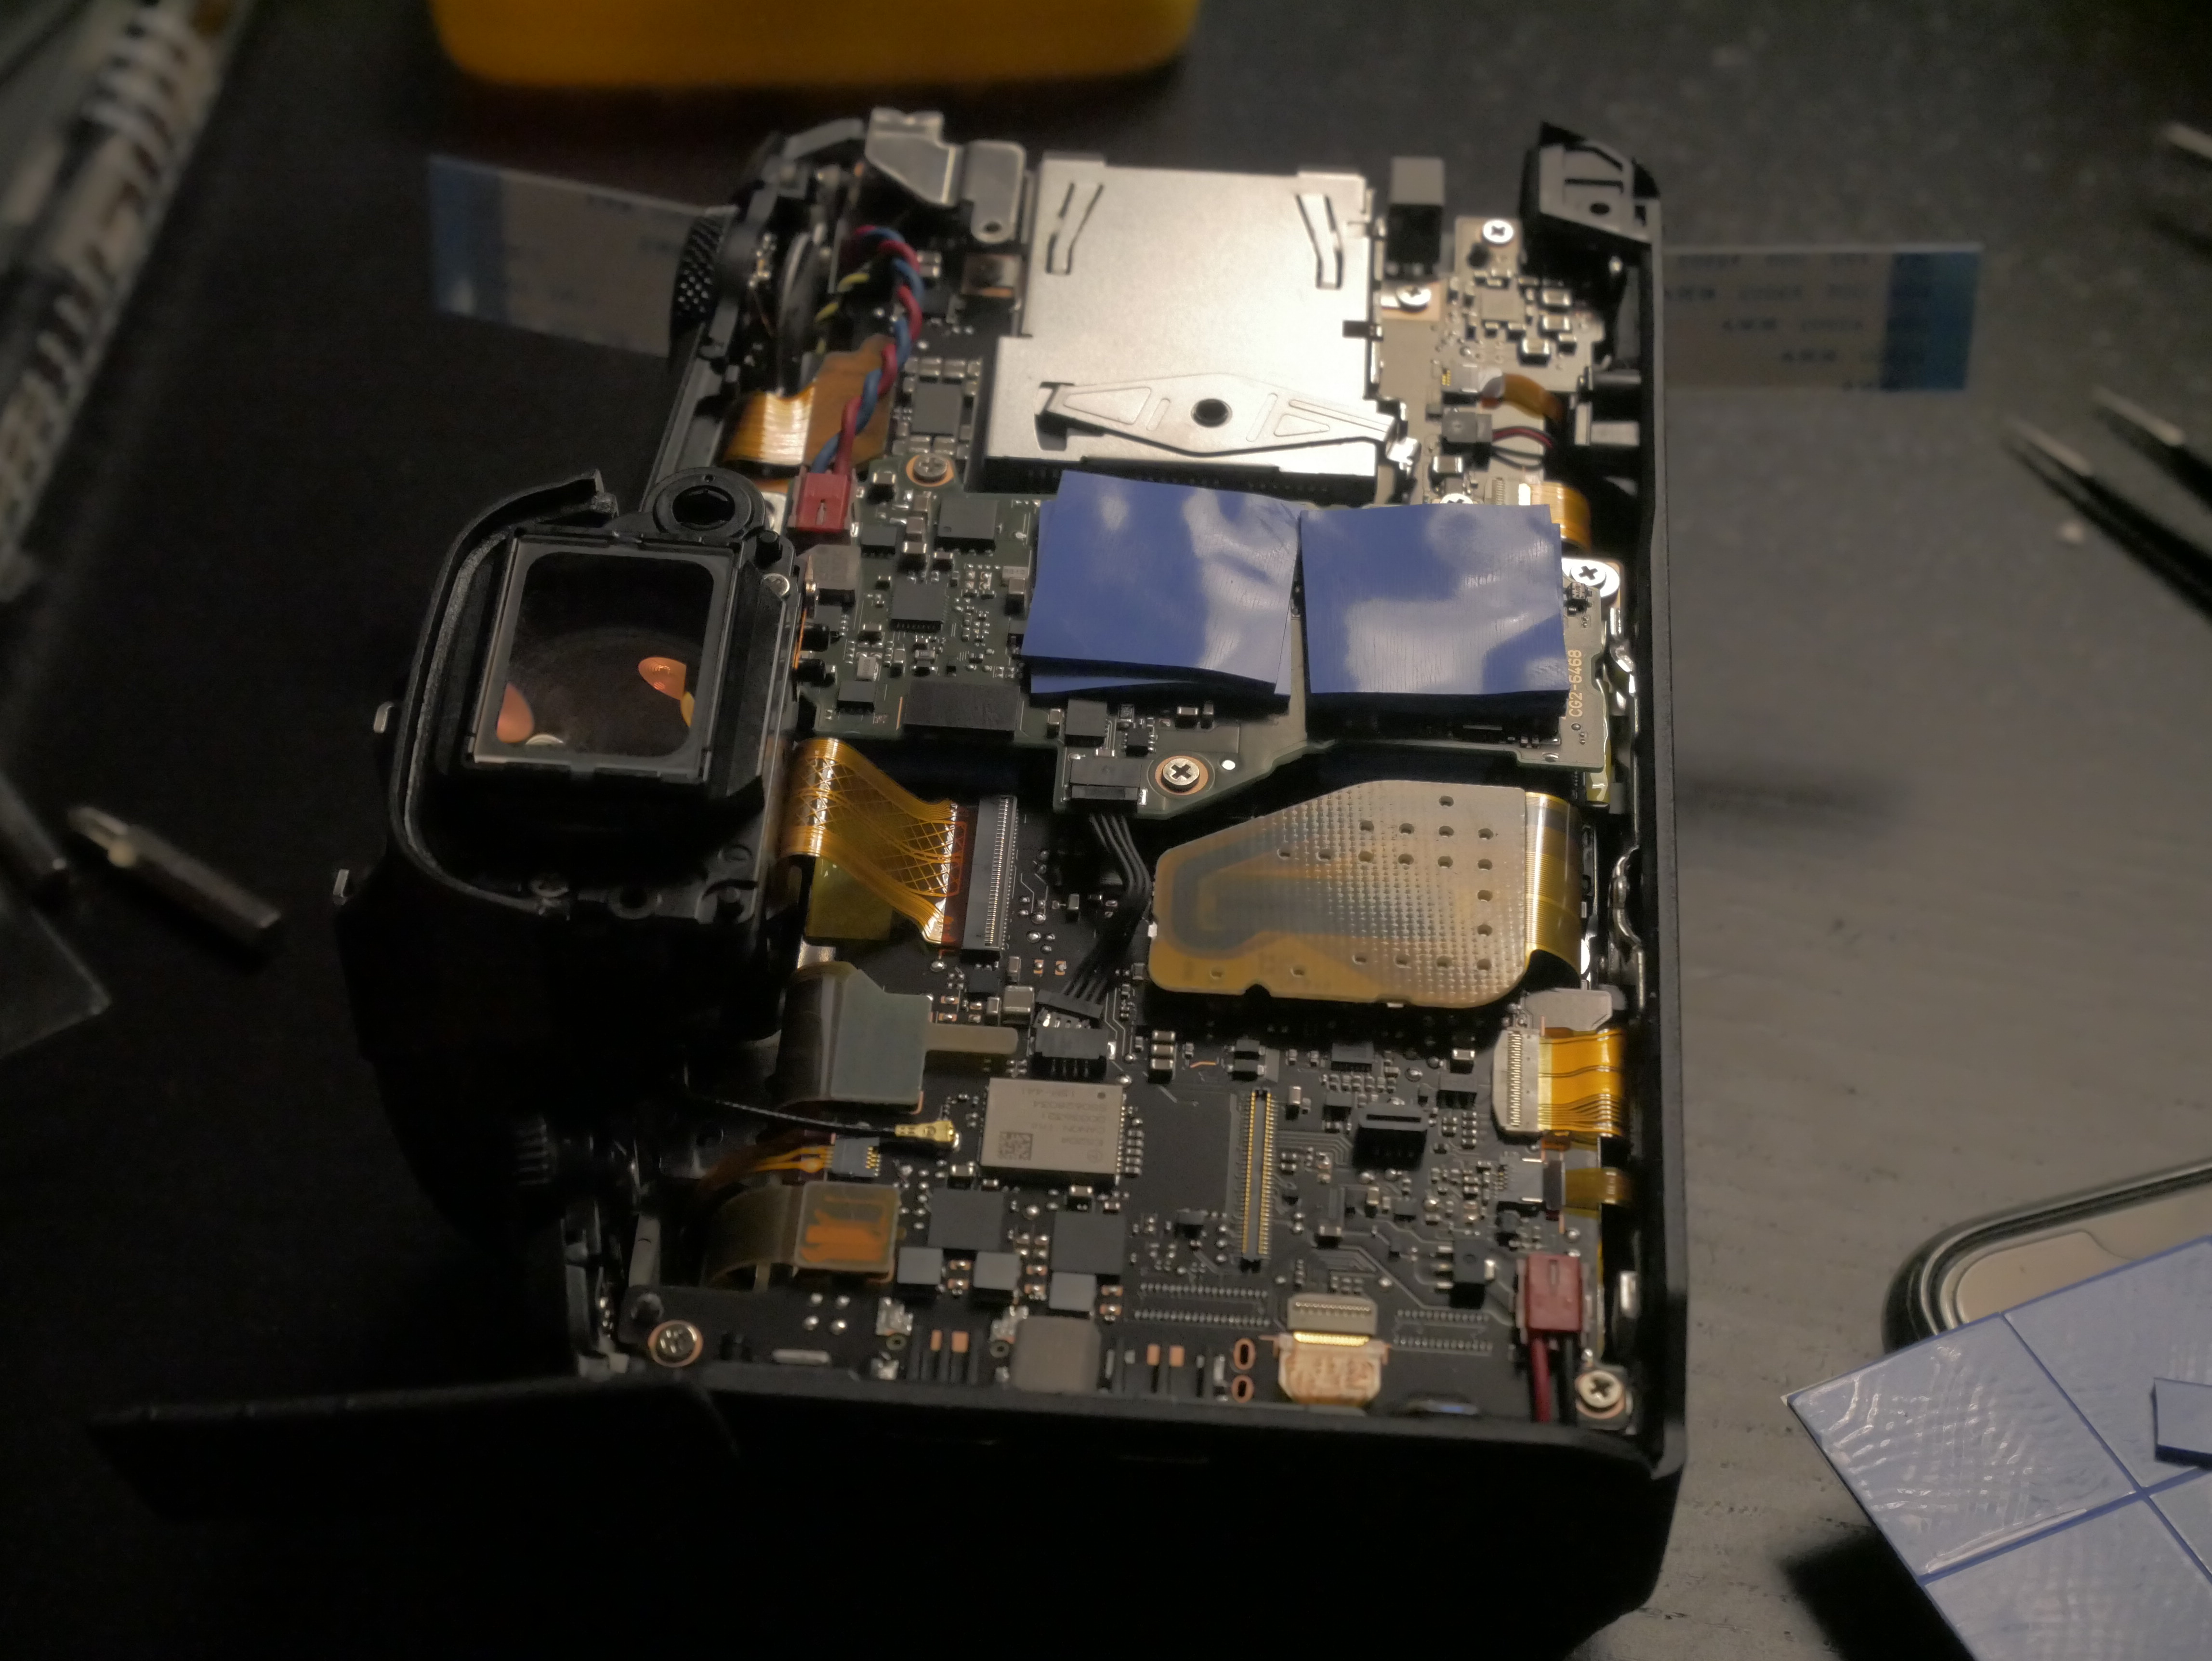
Remove the original white thermal pads covering the memory chips. After removing factory thermal pads, apply new thermal pads according to the image above:
- Blue: 1.5mm – 2mm (stack thermal pads if not thick enough)
- Green: 1.0mm
Reinstall the green board. Check from sides that the thermal pads are making good contact. (Don’t forget to reconnect the cable you disconnected!)
Cover the blue region with 2mm thick thermal pad (stack thermal pads if not thick enough)

Scrape the black pad off the back cover shown in the image above.
Reassemble everything back. Don’t brute force it.
Done!
In my testing, with 15 degree Celsius ambient, I am able to record unlimited DCI 8K All-I. I have to format the card every 10 minutes or so but otherwise I’m able to record until the battery dies. Have fun!
EDIT:
With room temperature (25C) it will still overheat in 8K. However sticking a fan next to it fixes it. See https://www.youtube.com/watch?v=hTCeBkpHkXw for proof.
EDIT2:
Another outdoor test (Outdoors, 23°C):
A few observations:
- After thermal mod, outdoors at 23°C, I’m able to get 48 minutes of 8K.
- The countdown timer works more like an internal temperature measuring.
- After overheating, with 8 minutes of cooldown, I’m able to get another 28 minutes of 8K.